Winter | Spring | Summer | Fall | Holiday
Baskets | Community
Herbs and Baskets
holiday
 Garlands are versatile decorations that can be used many
places-on the stairrails, the mantle, across doortops or
windows, or on tables.
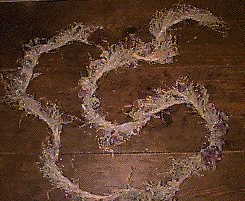
Making a garland from herbs you grew and dried is another way to bring your herb garden into the house for Christmas. Garlands are easy to make.
Supplies needed:
- base to hold the herb bundles -- thin roping, jute cord, or some other flexible, long material. Clothesline will work if it's not too slick.
- florist wire or fishing line to attach the herbs herbs with stems
- clippers and scissors-to cut the herbs, the wire or fishing line
- twist tie or small piece of yarn
Instructions:
- Spread paper on the table. Gather the supplies and herbs.
- Measure the place where the garland will hang or be placed. Allow for draping or curving and for hanging loops, if needed.
- Cut the base according to your measurement. Mark the center with a twist tie or by tying a piece of yarn at the center point.
- If you need hanging loops at the ends of the garland, tie those loops into your base. If your base is very sturdy, you may have to wire the loops to the base.
- Assembly will be faster if you wire all the herbs into bunches before you begin attaching the bunches to the base.
- To make a bunch, gather several stems of herbs together. Use florist wire, looped or wrapped around the stems to hold the bunch together. Wire the stems firmly, but be careful not to cut through the stems. Make as many bunches as needed to cover the base of the garland.
- Tie on the fishing line or florist wire at one end of the base. Work with the line or wire still attached to the spool or paddle.
- Attach herb bunches by looping wire or fishing line over the stems. Pull the wire tight. Add next bunch of herbs, covering the stem ends of the previous bunch. Continue to the center of the garland.
- At the center, stop. Remove the twist tie or yarn. Either reverse the direction the stems ends are pointing towards, or start the wiring process again from the other end, working towards the center.
- When the garland is completed, return to the center point. Make a bow or a medallion of herbs to cover the center point.
- If you are going to use the garland on a table or drape it down the stairrails, it is not necessary to reverse direction and make a mid-point decoration. If the garland is to hang over a door or window, the mid-point decoration helps center the garland and insures that foliage in the garland hangs the same way on each side of the door.
A garland made of herbs will be much thinner than a garland made from fresh greenery. You can attach your herbal garland to a background garland of fresh pine or other greenery for a fuller look. The fresh greenery makes the dried herbs stand out, as well as adding fullness to the herb strand.
Making a garland takes time. Allow 4 to 6 hours for a 10-foot garland if this is your first attempt and you are going to work in a casual, relaxed sort of way.
A faster technique is to purchase a garland of fresh greeney. Make the herb bunches as described above. Attach them at hanging points (corners of door, for example) to the purchsed garland after you hang it.
prev next
|
Site design, and webmastery by Cicada Consulting Group
Copyright © In Season Herbs and Basketsc 1997 All rights reserved. |
Page refreshed: Sat, Feb 23, 2002
http://www.inseason.com/holiday/garland.html |
 herb bunch detail